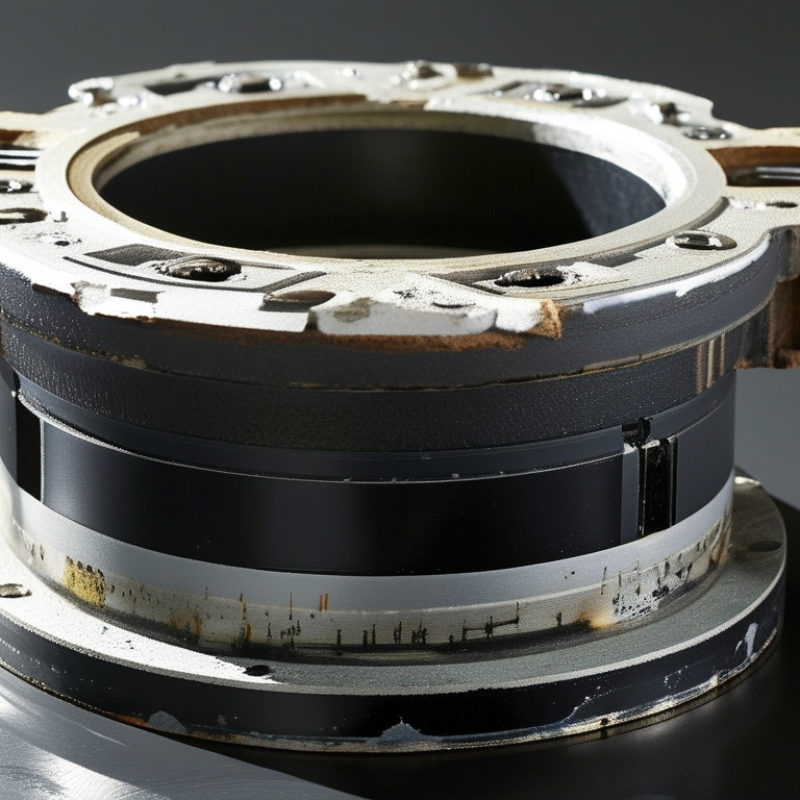
What Is a Mechanical Seal for Water Pump?

A Mechanical Seal For Water Pump is a precision barrier between a rotating shaft and the pump housing. It prevents water from escaping along the shaft during operation. Unlike a simple packing system, it uses carefully matched faces, springs, secondary seals, and a stationary seat. These parts work together under pressure, heat, vibration, and changing water conditions. Small details matter. A scratched seal face can cause visible leakage within hours.

Dr. Robert Flitney, a respected sealing author, offers a useful principle: “A seal’s performance depends on the whole pump system, not the seal alone.” This view helps explain why seal selection should never rely only on pump size. Shaft diameter, rotational speed, water temperature, pressure, alignment, and material compatibility all influence service life. Carbon, ceramic, silicon carbide, and stainless steel each behave differently in real applications. A dry-running pump can damage faces quickly. Poor installation can do the same.

This guide explains what a Mechanical Seal For Water Pump does, how its components operate, and why failures occur. It also considers practical choices for clean water, abrasive water, and chemically treated systems. The explanation is useful, but not perfect. Field conditions vary, and manufacturer data should always confirm the final selection. A seal that performs well in a cool workshop may fail beside a hot, vibrating pump. Understanding those differences leads to safer maintenance, fewer leaks, and more dependable pumping performance.

What Is a Mechanical Seal for Water Pump?

Definition and Basic Function of a Water Pump Mechanical Seal

A mechanical seal for a water pump is a precision sealing assembly around the rotating shaft. Its main purpose is to stop water from escaping where the shaft leaves the pump housing. It also keeps air, dust, and other contaminants away from the bearing area. The seal normally contains a stationary face, a rotating face, springs, and secondary sealing parts. These surfaces press together while the shaft turns.

Its basic function is simple but demanding. The two sealing faces create a controlled barrier against water pressure. A very thin liquid film reduces friction and carries away heat during operation. The spring maintains contact when pressure changes or the pump starts and stops. Without this balance, the seal may wear quickly, overheat, or leak.
Small leaks matter.

In practical maintenance, technicians inspect moisture near the shaft, unusual noise, and drops in pump pressure. Dry running is especially harmful because the sealing faces need liquid for cooling and lubrication. A seal can look clean and still be damaged. That assumption is risky. Correct installation also requires clean hands, aligned parts, and careful handling of the polished faces. Even a small scratch can create a leakage path. Material selection depends on water temperature, pressure, suspended particles, and chemical conditions. Standard materials may perform well in ordinary water, but not in every system. The overlooked detail is often the operating environment.

Main Components and How the Sealing Mechanism Works

What Is a Mechanical Seal for Water Pump?

A mechanical seal prevents water from escaping where a pump shaft enters its casing. Unlike packing, it seals through carefully matched faces. The main parts include a rotating face, a stationary face, springs, secondary seals, and a gland or seal housing. The rotating face follows the shaft. The stationary face remains fixed against the housing.

During operation, the springs push both faces together. Water pressure also helps maintain contact. A microscopic water film forms between the faces. This film reduces friction and carries away some heat. The faces must stay extremely flat. Even a small scratch can create a visible leak. The secondary seals protect the shaft and prevent fluid from bypassing the sealing faces. Elastomer selection matters because temperature, pressure, and water chemistry affect its performance.

Installation quality often decides service life. The shaft should be clean, aligned, and free from burrs. Never run the pump dry. Without water, the seal faces can overheat within seconds. During maintenance, technicians should inspect spring movement, face damage, shaft wear, and deposits around the seal. A slight drip may indicate early wear, but it can also result from poor installation or trapped air. This part is easy to misread. In practice, replacing the seal alone may not solve the problem if vibration or shaft misalignment remains.

Common Types of Mechanical Seals Used in Water Pumps

What Is a Mechanical Seal for Water Pump?

A mechanical seal is a fitted barrier around a pump shaft. It limits water leakage where the shaft enters the casing. Two polished faces press together while the shaft rotates. Springs maintain contact, and elastomers seal the edges. A small leak can quickly damage bearings, insulation, or nearby flooring.

Common Types of Mechanical Seals Used in Water Pumps

Pusher seals use springs and sliding secondary seals to follow minor shaft movement. They are common, practical, and usually economical.

Non-pusher seals use a bellows instead of sliding elastomers. They handle some shaft movement with less friction.

Cartridge seals arrive preassembled, which reduces installation errors and saves service time. They suit maintenance teams working under tight schedules.

Split seals can be installed without removing the pump or motor. This feature helps with large pumps and difficult access. Balanced seals reduce hydraulic loading on the faces. They are useful when pressure or speed increases. Unbalanced seals remain simple and reliable for many standard water systems. Material selection matters as much as seal design. Carbon, ceramic, stainless steel, and compatible elastomers must match the water quality and temperature.

The best choice is rarely based on pump size alone. Check pressure, shaft diameter, temperature, solids, and operating hours. Field inspections often reveal scoring, dry-running marks, or hardened elastomers. These clues may expose an unsuitable seal or poor installation. The distinction is not always clean. A cartridge seal can still fail when alignment is poor or the pump runs without water.

Materials, Performance Factors, and Operating Conditions

A mechanical seal for a water pump prevents water from escaping along the rotating shaft. It works between a rotating face and a stationary face inside the pump housing. These faces must remain flat, clean, and properly loaded during operation.

Material selection affects service life. Carbon provides good running properties and suits many clean-water systems. Silicon carbide handles abrasive particles and higher wear better. Ceramic is economical for moderate conditions, while stainless steel supports structural strength. Elastomers also matter. EPDM performs well with hot water, but compatibility must be checked before installation. NBR may suit ordinary water, while other fluids require different compounds.

Operating conditions often decide whether a seal succeeds. Check pressure, temperature, shaft speed, water quality, and the possibility of dry running. Sand can scratch the sealing faces like fine glass. A pump that runs without water may damage the faces within minutes. Misalignment and excessive shaft movement create uneven contact and leakage. During maintenance, technicians should inspect deposits, scoring, spring fatigue, and elastomer swelling. Small defects matter.

Real installations are rarely perfect. A seal selected from a catalog may fail when the water contains unexpected solids. I have seen troubleshooting focus on the seal, while a blocked suction line caused the real problem. Careful inspection beats quick replacement. Seal performance depends on the whole pump system, not one component.

Installation, Maintenance, Failure Causes, and Replacement Guidelines

A mechanical seal prevents water from escaping where a rotating pump shaft passes through the casing. Its faces must remain flat, clean, and correctly lubricated by the pumped fluid. During installation, technicians should inspect the shaft sleeve, remove sharp edges, and avoid touching seal faces with bare fingers. Even a small fingerprint can create a leakage path.

Alignment matters. The pump and motor should be aligned within the manufacturer’s specified tolerance. Tighten fasteners gradually and measure spring compression carefully. Never start a pump with a dry seal. The U.S. Department of Energy’s Improving Pumping System Performance: A Sourcebook reports that pumping systems may consume 25–50% of industrial electricity. Efficient sealing supports reliable operation, but poor installation can waste energy through friction and repeated repairs.

Maintenance teams should check leakage, vibration, temperature, and unusual noise during routine rounds. A steady drip, darkened seal face, or cracked elastomer deserves attention. Common failure causes include dry running, abrasive particles, excessive pressure, shaft movement, corrosion, and incorrect material selection. Replacement should follow the original dimensions and operating conditions, not appearance alone. Confirm shaft size, pressure, temperature, speed, and chemical compatibility before ordering. The Fluid Sealing Association’s technical guidance also stresses correct face materials and controlled installation practices. Still, no checklist is perfect. Field records often omit startup conditions, which makes failure analysis incomplete. Photographing worn faces and recording operating data can reveal the real cause.

What Is a Mechanical Seal for Water Pump? - Installation, Maintenance, Failure Causes, and Replacement Guidelines

Section Data Dimension Practical Information Typical Value or Guideline
Overview Definition A mechanical seal is a dynamic sealing device fitted around a rotating pump shaft to prevent water or process fluid from leaking along the shaft. Designed for continuous shaft rotation
Primary sealing faces The rotating and stationary faces run against each other to form the main fluid barrier. Typical materials include carbon, ceramic, silicon carbide, or tungsten carbide
Secondary sealing elements O-rings, bellows, wedges, or gaskets seal between the faces and the shaft or rotating assembly. Elastomer selection must match fluid and temperature
Main purpose Reduces leakage, protects bearings and motor components, and helps maintain pump efficiency. A small initial film of water may lubricate the seal faces
Common applications Used in centrifugal, circulation, booster, irrigation, HVAC, and general water-service pumps. Selection depends on pump design and operating conditions
Construction Rotating seal face Rotates with the shaft and contacts the stationary face. Must remain flat, clean, and free from scratches
Stationary seal seat Remains fixed in the pump housing and provides the mating surface for the rotating face. Installed squarely in the seal chamber
Spring or bellows Maintains contact pressure between the primary sealing faces as components move or wear. Must not be blocked by scale, dirt, or corrosion
Gland or retainer Holds the stationary components in position and helps maintain correct axial alignment. Fasteners should be tightened evenly
Shaft sleeve Protects the pump shaft from wear and provides a suitable surface for the seal’s secondary element. Inspect for grooves, pitting, and corrosion
Elastomer Provides flexible sealing around the shaft and between stationary components. Common choices include EPDM, NBR, FKM, and PTFE-based elements
Installation Safety isolation Stop the pump, isolate electrical power, close valves, relieve pressure, and drain the casing before work begins. Lockout and tagout required
Component verification Confirm shaft diameter, seal chamber dimensions, working length, rotation direction, pressure, temperature, and fluid compatibility. Never select a seal by appearance alone
Cleaning Clean the shaft, sleeve, seal chamber, and mating surfaces with a lint-free cloth. Remove rust, scale, old gasket material, and debris
Face handling Do not touch polished sealing faces with bare fingers or place them face-down on dirty surfaces. Use clean gloves and protect faces from impact
Lubrication Lightly lubricate compatible elastomers during assembly. Do not use a lubricant that attacks the rubber or contaminates the pumped fluid. Use clean water or a compatible assembly lubricant when permitted
Alignment and tightening Install components squarely and tighten gland or housing fasteners in a gradual, crosswise pattern. Avoid cocking, uneven compression, and excessive torque
Pre-start check Rotate the shaft by hand when safe, refill and vent the pump, and verify that the seal is wetted before starting. Never run a standard water seal dry
Operating Parameters Pressure The seal must be rated for the actual pressure at the seal chamber, including pressure changes during operation. Use the seal’s published pressure rating
Temperature Temperature affects elastomer life, face distortion, lubrication, and fluid viscosity. Remain within the selected material’s temperature range
Shaft speed Higher speed increases heat generation at the sealing faces and may require a different seal design. Match the seal to pump revolutions per minute
Fluid quality Sand, rust, scale, suspended solids, and crystallized chemicals can abrade or damage sealing faces. Use filtration or flushing where necessary
Shaft runout Excessive shaft movement prevents stable contact between the seal faces. Check shaft condition and alignment if leakage persists
Dry-running tolerance Most water-pump mechanical seals depend on liquid for cooling and lubrication. Avoid dry running, even for short periods
Maintenance Routine visual inspection Inspect for visible leakage, spray, deposits, corrosion, abnormal noise, and overheating. Check during scheduled pump rounds
Leakage monitoring A stable, very small moisture film may occur during bedding-in, but increasing or continuous leakage requires investigation. Record leakage trend rather than relying on a single observation
Pump alignment Check coupling alignment, shaft condition, bearing condition, and vibration when seal life is unusually short. Correct mechanical causes before installing another seal
Flush or cooling system Where fitted, keep flush lines open and free from blockage, and verify adequate flow. Follow the pump maintenance schedule
Spare-parts storage Store seals in a cool, dry, clean location away from sunlight, ozone sources, oils, and sharp objects. Keep elastomers sealed and protected from deformation
Failure Causes Dry running Insufficient liquid causes rapid face overheating, cracking, blistering, or carbon damage. Verify priming, liquid level, and suction conditions
Contaminated fluid Abrasive particles can score the faces and wear the elastomers. Improve filtration or use abrasion-resistant materials
Incorrect installation Scratched faces, reversed components, damaged O-rings, or incorrect working length can cause immediate leakage. Use clean tools and verify assembly orientation
Shaft misalignment Misalignment or excessive runout causes uneven face loading and accelerated wear. Inspect coupling, bearings, shaft, and housing
Excessive vibration Cavitation, imbalance, worn bearings, or a bent shaft can disturb the sealing interface. Resolve the vibration source before replacement
Chemical incompatibility The pumped liquid may swell, harden, crack, or soften the elastomer. Select materials based on actual fluid chemistry and concentration
Thermal damage High temperature can distort faces, degrade elastomers, and reduce the liquid film between faces. Check operating temperature and cooling arrangements
Corrosion or scaling Deposits can prevent spring movement and damage contact surfaces. Clean the chamber and assess material compatibility
Replacement Guidelines Replacement indicators Replace the seal when leakage increases, faces are visibly damaged, elastomers are hardened, or the spring mechanism is corroded or seized. Replace before leakage threatens bearings or electrical parts
Seal identification Measure shaft or sleeve diameter and record the original seal dimensions and material codes where available. Critical dimensions include diameter, working length, and seat size
Material selection Choose face and elastomer materials for the fluid, temperature, pressure, speed, and presence of solids. Do not substitute materials without technical verification
Related inspections Inspect the shaft, sleeve, bearings, coupling, seal chamber, gasket surfaces, and impeller while the pump is open. Repair damaged components before fitting the new seal
Post-replacement test Prime and vent the pump, check rotation, start under normal conditions, and monitor leakage, temperature, pressure, and vibration. Observe closely during the first operating cycle
Documentation Record seal dimensions, materials, installation date, operating conditions, failure mode, and corrective action. Use records to improve future seal selection and maintenance intervals
Troubleshooting Leakage immediately after installation Possible causes include damaged faces, incorrect orientation, contaminated surfaces, wrong setting length, or a damaged elastomer. Stop and inspect rather than repeatedly tightening components
Leakage after several operating hours Possible causes include dry running, solids in the fluid, thermal distortion, vibration, or incompatible materials. Review actual operating conditions against seal limits
Seal overheating Possible causes include insufficient liquid, excessive pressure, excessive speed, blocked flush flow, or face contact without lubrication. Verify priming, cooling, pressure, and rotation conditions
Repeated short seal life Repeated failures usually indicate an unresolved system problem rather than an isolated seal defect. Perform root-cause analysis before selecting another replacement
Technical note: Actual pressure, temperature, speed, dimensions, materials, and installation procedures must be verified against the pump and mechanical-seal technical documentation before maintenance or replacement.
Go to Top