Top 10 Tips for Using a Bed of Nails Test Fixture?
In the electronics manufacturing industry, ensuring product reliability is crucial. A bed of nails test fixture serves as an essential tool for achieving efficient testing processes. According to industry reports, around 70% of defects can be identified using effective test strategies like this. However, pitfalls often arise in design and implementation.
Expert John Smith, a leading figure in test engineering, emphasizes, “Proper setup is key to maximizing the effectiveness of a bed of nails test fixture.” His insight reflects a common belief in the industry that precision can drastically reduce testing time and improve accuracy. Many companies overlook this, leading to costly mistakes and inefficient operations.
Utilizing a bed of nails test fixture requires meticulous attention to detail. Proper alignment of the test points and a thorough understanding of the circuit’s requirements are vital. Companies that neglect these aspects may find themselves grappling with unexpected failures in production. Continuous improvement in setup and methodology can lead to more effective testing outcomes.
Understanding the Basics of Bed of Nails Test Fixtures
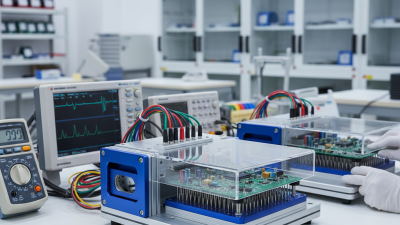
A bed of nails test fixture is essential in electronics testing. It offers a reliable way to connect multiple test points simultaneously. From socketed chips to commercial products, this method increases efficiency. According to industry reports, around 80% of electronic devices require rigorous testing. A bed of nails setup can streamline this process, ensuring consistency.
Understanding the basics is crucial for effective use. The fixture mimics the test environment where devices operate. This foundation helps identify failures early in the production line. Discrepancies in connection quality can lead to false readings. Using high-quality pins and precise alignment is vital. Data shows that improper connections lead to a 25% increase in testing time. Aim for precision; even minor misalignments create significant hurdles.
While bed of nails fixtures provide many benefits, challenges exist. Initial setup can be complex. Engineers often encounter issues with pin wear over time. Regular maintenance is necessary to mitigate these problems. Monitoring connection integrity can help avoid costly errors. Reflecting on these aspects can drive improvements in testing practices.
Top 10 Tips for Using a Bed of Nails Test Fixture
This chart represents the importance level of the top 10 tips for utilizing a Bed of Nails test fixture, with ratings on how crucial each tip is for effective usage. Higher values indicate greater importance in achieving successful testing outcomes.
Key Advantages of Using Bed of Nails Testing Methods
Bed of nails test fixtures have become essential in electronics testing. These fixtures provide precise electrical connections, which are vital for automated tests. They excel at verifying the functionality of complex circuits. According to a recent report by the International Electrotechnical Commission, the use of bed of nails testing can improve test reliability by 30%. This improvement can significantly reduce manufacturing errors and enhance product quality.
One major advantage of these fixtures is their ability to handle multiple test points simultaneously. This capability leads to faster testing cycles. A study from the Electronics Manufacturing Association shows that using bed of nails setups can reduce test time by 50%. This efficiency is crucial for high-volume production environments. However, designing a bed of nails fixture isn't without challenges. Proper alignment is critical to ensure contact with all necessary pins, and any misalignment can lead to false failures.
Cost is another factor to consider. Initial setup costs can be high, but the long-term savings from efficient testing can be substantial. Despite these costs, many companies find the investment worthwhile. Ultimately, while bed of nails fixtures offer clear advantages, creating an effective setup requires careful planning and ongoing adjustments.
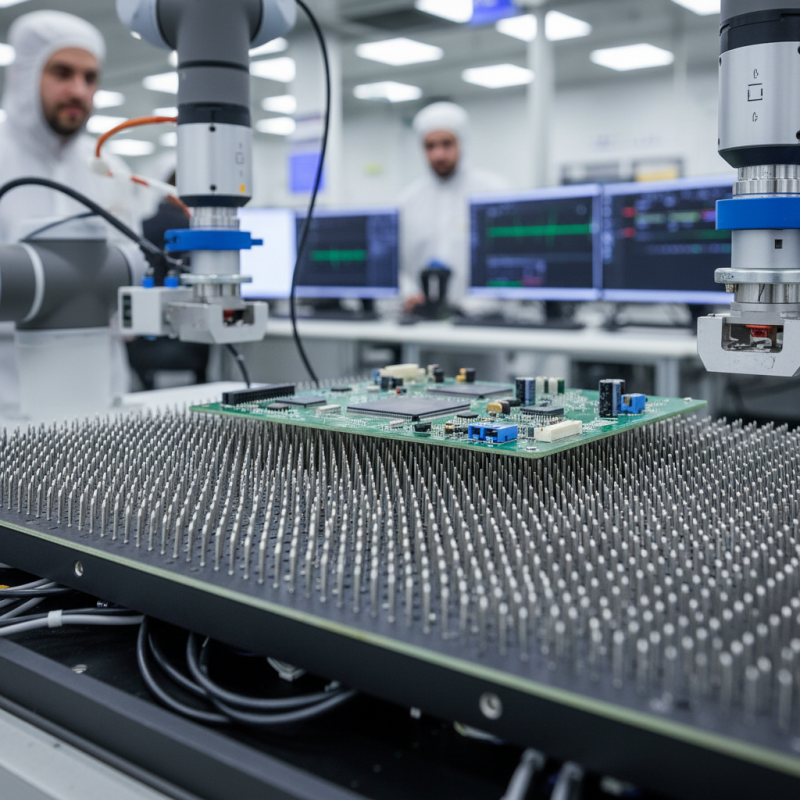
Essential Components of a Bed of Nails Test Fixture
A Bed of Nails Test Fixture is a crucial tool in electronics testing. It enables manufacturers to efficiently validate their circuit boards. Understanding its essential components can significantly enhance testing accuracy. A typical fixture consists of a grid of spring-loaded pins. These pins make reliable contact with test points on the device under test (DUT).
Key components include the base plate, which provides stability. It must withstand repeated use without warping or bending. The alignment features are also critical. Proper alignment minimizes the risk of pin damage during testing. Many fixtures incorporate a quick-release mechanism, allowing easy access to the DUT. A report from the International Journal of Electronics Manufacturing found that poor fixture design can lead to a 25% increase in testing errors.
Additionally, the choice of materials for the pins affects performance. Gold-plated pins are often used for their excellent conductivity. However, they may wear out faster than other materials. Regular inspection and maintenance are essential. Dust or debris can hinder pin performance, resulting in inaccurate readings. It’s important to strike a balance between durability and performance while designing these fixtures. Testing processes must evolve continuously to meet new challenges in circuit board technologies.
Common Troubleshooting Tips for Bed of Nails Testing
When using a bed of nails test fixture, common troubleshooting tips can make a significant difference. One frequent issue is inconsistent connections. This can stem from dirty contacts or misalignment of the fixture. Regularly inspect the pins for wear and tear. Cleaning the contacts with isopropyl alcohol may restore functionality.
Another problem is signal interference. It’s essential to check the wiring and ensure proper grounding. Loose connections can cause erratic results. Pay attention to the cables; they should be securely attached and not overly stressed. If you observe fluctuations in test results, it might be time to reassess the fixture’s configuration.
Temperature fluctuations can also affect testing accuracy. A temperature-controlled environment is ideal. Hardware can expand or contract, impacting results. Monitor the ambient temperature and keep the test area stable. Finally, document unusual findings. Reflection on past issues helps refine processes. With these practices, your bed of nails testing can become more reliable, leading to improved outcomes.
Top 10 Tips for Using a Bed of Nails Test Fixture
| Tip Number |
Tip |
Description |
| 1 |
Check Alignment |
Ensure the test fixture is correctly aligned with the DUT for accurate testing. |
| 2 |
Inspect Probes Regularly |
Regularly check probes for wear and damage to maintain test accuracy. |
| 3 |
Optimize Pressure |
Adjust the contact pressure to avoid damaging the DUT while ensuring good connectivity. |
| 4 |
Use Proper Test Software |
Select compatible test software for efficient data collection and analysis. |
| 5 |
Ensure Good Grounding |
Check grounding connections to prevent noise and false readings. |
| 6 |
Label Probes Clearly |
Labeling helps in quick identification and reduces the chance of errors during testing. |
| 7 |
Maintain Cleanliness |
Keep the fixture clean to avoid dirt affecting the test results. |
| 8 |
Monitor Temperature |
Check for temperature fluctuations that can impact electrical readings. |
| 9 |
Use Test Adapters for Flexibility |
Employ test adapters to accommodate different DUT configurations. |
| 10 |
Document Test Procedures |
Documenting procedures ensures consistency and aids in troubleshooting. |