How to Use a Semiconductor Curve Tracer for Testing?
In the realm of electronics testing, understanding the capabilities of a semiconductor curve tracer is essential. Dr. Emily Chen, a leading expert in semiconductor testing, once stated, "A semiconductor curve tracer reveals the hidden characteristics of devices." This tool allows engineers to analyze the performance of semiconductor components in a precise manner.
Using a semiconductor curve tracer involves setting up various parameters to measure current and voltage characteristics. These measurements can help identify potential issues in components. However, improperly configuring the device could lead to misleading results. Many users struggle with calibration, causing frustration and misinterpretation of data.
Diving into the nuances of operation, attention to detail is vital. A semiconductor curve tracer can showcase a range of behaviors in devices. Yet, the technology itself may not reveal every problem present in a component's performance. Reflecting on the limitations of this tool can aid in better understanding and prompt more thorough investigations into device functionality.

Understanding the Basics of Semiconductor Curve Tracers
Understanding the basics of semiconductor curve tracers begins with recognizing their purpose. These devices measure the current and voltage characteristics of semiconductor components. This helps visualize their performance through graphical output. Users can gain insights into the behavior of diodes, transistors, and other devices.
To operate a curve tracer effectively, one must set the parameters carefully. Adjusting voltage settings is crucial. A wrong setting can lead to inaccurate readings. A common error is not monitoring the temperature of the device. High temperatures may skew results, leading to misconceptions about a component's health. Observing the displayed curve shape helps identify issues like breakdown or saturation.
Learning to interpret the curves is essential for effective testing. Each curve provides detailed information, yet misinterpretation can occur. For instance, closely resembling curves might mislead users to believe components are identical. Taking time to gain proficiency with these devices is important. Even experienced users occasionally overlook minor details, necessitating re-evaluation of results. Embracing a mindset of reflection will enhance testing accuracy.
Essential Components and Setup of a Curve Tracer
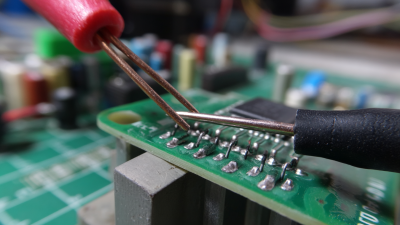
A semiconductor curve tracer is essential for testing semiconductor devices. It provides a graphical representation of the current-voltage characteristics. To effectively use one, you need key components: the curve tracer itself, test leads, and the semiconductor device under test. A stable power supply is also crucial.
The setup begins with connecting the device proper. Ensure the leads are in good condition to avoid incorrect readings. Adjust the range settings on the tracer. According to the Semiconductor Equipment and Materials International report, precise settings increase accuracy by up to 30%. This accuracy is vital for reliable performance data.
Tips: Always calibrate the curve tracer before testing. A miscalibrated device can lead to data discrepancies. Monitor for overheating during testing. This allows better longevity for your tester and intellect for interpretation. Test multiple devices for comparability; it can expose outliers or inherent issues that may need addressing. Each device can behave differently, revealing insights into performance consistency.
Step-by-Step Procedure for Testing Semiconductors
A semiconductor curve tracer is an essential tool for testing various types of semiconductors. Understanding how to use it effectively is crucial. Start by connecting the device leads to the semiconductor. Ensure clear connections, as loose wires can lead to inaccurate readings. Power up the curve tracer and monitor the display. Pay attention to the waveform produced; it holds valuable insights about the component.
Next, observe the characteristics displayed. A diode should show a sharp turn-on point. If the curve is flat, it may indicate a problem. For transistors, analyze the output between the collector and emitter. Look for unusual spikes or erratic behavior. These could signal defects. Note your observations, but don't rush. Each reading deserves thoughtful evaluation. You might miss subtle issues if you hurry through the analysis.
Testing requires patience and practice. Errors can occur, leading to incorrect conclusions. Always question your results. If something doesn't seem right, troubleshoot the setup. Test another component for comparison. This practice helps in honing your skills. Each test you conduct deepens your understanding, but it’s vital to remain open to errors and learning.
Interpreting the Results from a Curve Tracer
Using a semiconductor curve tracer can be insightful for testing devices. When interpreting the results from a curve tracer, focus on the current-voltage (I-V) characteristics. This graph tells a story about the semiconductor’s performance. Look for key points like the threshold voltage and the saturation region.
To effectively interpret the data, understand what the curves indicate. A steep slope typically means high gain. Flat regions may suggest saturation or breakdown. Be cautious with unexpected readings. Outlier results might signal underlying issues. Validate your setup before drawing conclusions.
Tips: Always check connections. Loose wires can lead to inaccurate readings. Utilize the curve tracer's built-in features for accurate measurements. If a curve seems off, reconsider your method. Check input parameters closely. Experimenting with different settings can reveal more about your device.
Common Troubleshooting Tips for Curve Tracer Testing
When using a semiconductor curve tracer, troubleshooting is essential. If the device doesn't power up, check the connections. Ensure all cables are securely plugged in. A loose connection can lead to erratic readings. If the display shows strange patterns, verify the settings. Incorrect voltage levels can distort the output. Adjust the range accordingly to see clearer results.
Sometimes, the test leads can wear out over time. Inspect them for any damage or frays. A broken lead can result in misleading measurements. Additionally, be aware of the environment. High humidity or dust can affect performance. Keep the curve tracer clean and dry for optimal functioning. If you notice fluctuations in the output, it may indicate an internal issue. Take time to reassess the entire setup.
Occasionally, components under test may be damaged or faulty. This can yield unexpected traces. Always cross-check results against known good devices. If discrepancies arise, reassess techniques and assumptions. Each test provides learning opportunities, even when results aren't as expected. Embrace these moments to improve your skills and understanding.
How to Use a Semiconductor Curve Tracer for Testing? - Common Troubleshooting Tips for Curve Tracer Testing
| Test Parameter |
Optimal Range |
Common Issues |
Troubleshooting Tips |
| Input Voltage |
0V - 15V |
Reading fluctuations |
Ensure stable power supply |
| Current Measurement |
1mA - 100mA |
Inaccurate readings |
Calibrate the current probe |
| Temperature |
-10°C - 60°C |
Device overheating |
Use cooling methods |
| Resistor Setting |
1Ω - 10kΩ |
Inconsistent results |
Check resistor connection |
| Sweep Rate |
0.1s - 5s per sweep |
Measurement delay |
Adjust the sweep speed |